Mark 8/Thunder Bird two speed electric fan install

Engine, ignition, fuel, cooling, exhaust

Moderators: Ranchero50, DuckRyder

Post Reply
67Doors
New Member
New Member
Posts: 56
Joined: Tue Mar 12, 2013 9:25 am

Mark 8/Thunder Bird two speed electric fan install

Post by 67Doors »

I recently installed an electric fan setup in my 67 F100 and figured I would share the information on my install. I have a 302 out of a 72 F100 and I am sure different engines will need to be installed a little differently than mine but at least this will get you pointed in the right direction. I also have a heavy duty 4 core radiator installed as well although I think you would be fine with a 3 core.

General Parts List
1. 130 amp or high output alternator

2. Mark VIII Relay Kit from Hollister Road http://www.hollisterroad.com/proddetail ... d=MarkVIII
You can custom order this kit to fit your needs and comes with everything you need to wire the fan (except fan plug) including all the connectors, fuses, relays and sensors. Really made installing the fan very simple.

3. Fan plug http://www.hollisterroad.com/proddetail ... I_Fan_Plug

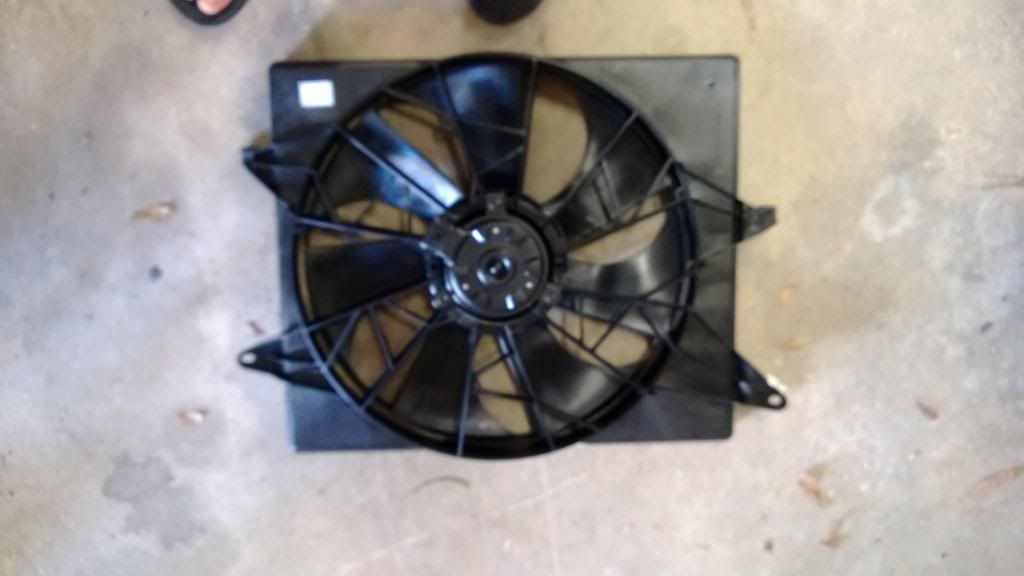
4. TYC Electric fan part #620950 from rockauto. This is a two speed fan is for a 94 Ford TBird 4.6 V6. This fan moves more air than most if not all of the aftermarket fans at a fraction of the cost: http://www.rockauto.com/catalog/moreinfo.php?pk=1375559
Image


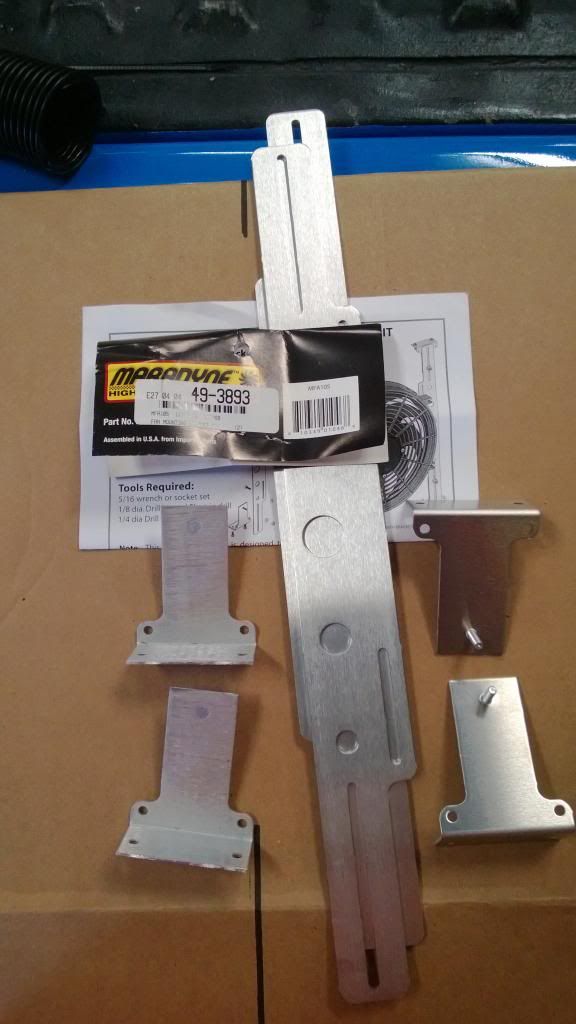
5. Fan Mounting kit from LMC part # 49-3893 I am sure a lot of you could make up your own brackets but this kit worked really well. I only used the L brackets in the kit. http://www.lmctruck.com/icatalog/fb/full.aspx?Page=43
Image

6. 4 5/16 -24 x 1” bolts for the water pump pulley

7. 8 ¼ x 1/2'-3/4' bolts, lock nuts and fender washers

8. 160 or 170 thermostat

Install Notes (everyone’s install might be a little different but this should cover some of the basics.)

1. You must have the 130 alternator converstion setup to install this electric fan or 100amp plus altenator to be able run everything correctly. You can read more about the conversion here: http://www.fordification.com/forum/view ... =8&t=13062

2. Remove Fan and Radiator shroud, and top radiator house. (would like to note that I had my radiator out for my install but will try to give instructions with the radiator still in the truck)

3. Install 160 or 170 thermostat. If you have a 180 or higher thermostat installed your electric fan will never shut off.

4. Install 5/16 -24 x 1 bolts into water pump pulley

5. Cut the OEM mounting tabs off of the side fan. I used a coping saw but sure you could use a hack saw. Just make sure not to cut into the shroud.

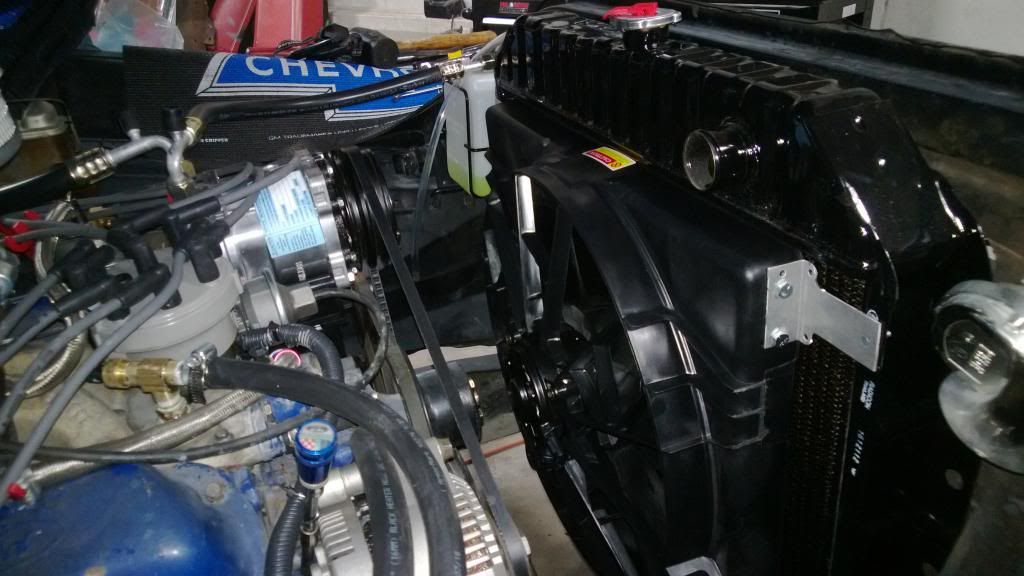
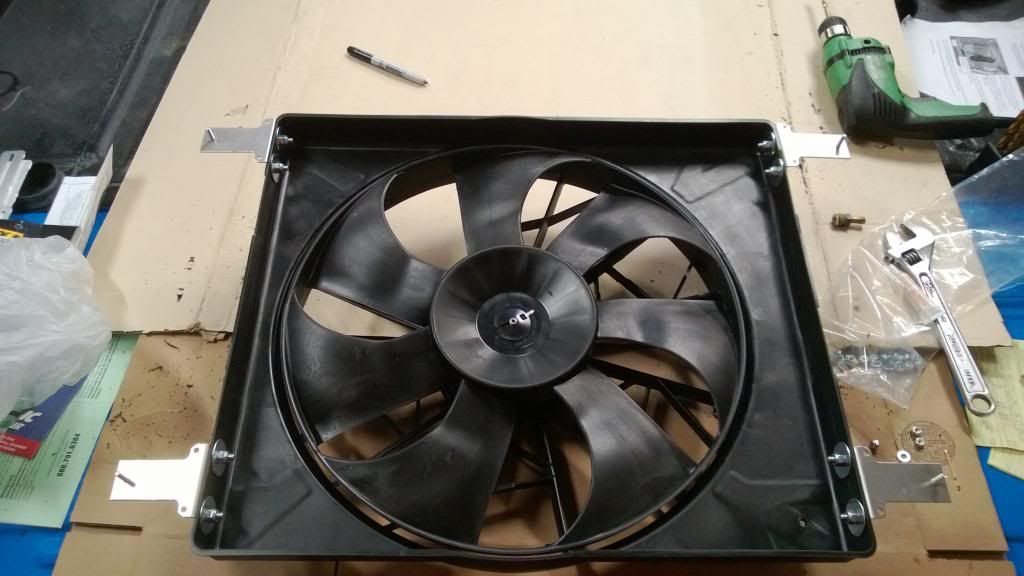
6. Drill out the holes in the L brackets from the kit to work with the ¼ bolts and also drill an extra hole in two of the brackets about ¾ inch down from one of the original holes. (see image below) Make sure to drill the hole in the same location on two of the brackets. This will be needed when mounting the fan because the outside holes for the top mounts will be too close to the corner of the fan if you use the same radiator holes I used. Take the 4 L brackets from the kit and mount them on the outside of your Radiator. There should be 4 larger holes in your radiator that you can use that are there from the factory (at least they where there for me). I used these because it gives you some extra movement to adjust the brackets. I used larger washers to keep the nuts from pulling through the larger holes. Only snug the brackets down tight enough to hold them but loose enough so you can adjust the brackets if needed. (This step would be much easier if your radiator is out but not a necessity)
Image

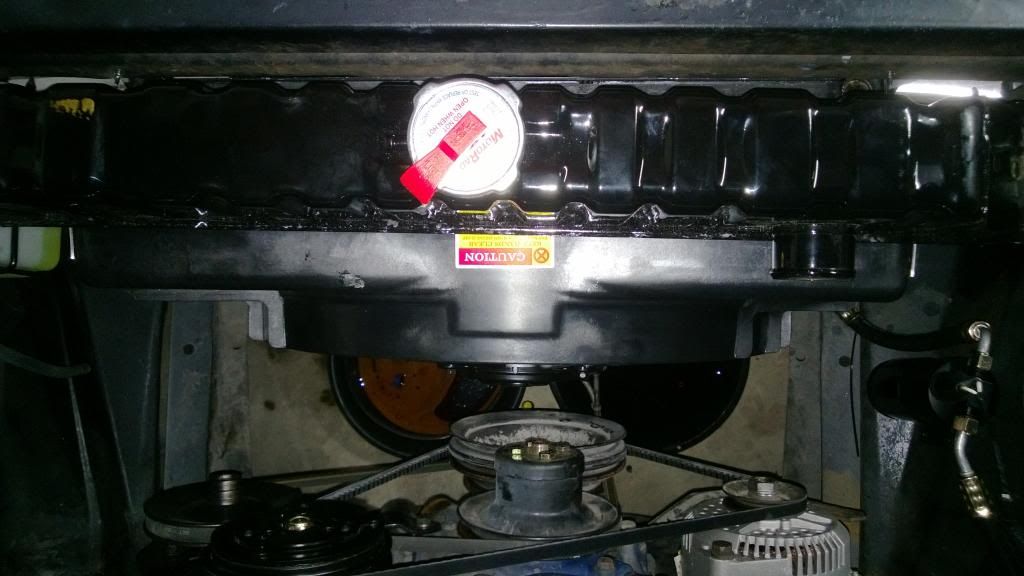
7. Place the fan on the radiator between the brackets. I pulled the fan all the way to the top edge of the radiator core. Have someone hold the fan so you can mark the holes that need to be drilled to mount the fan to the brackets. Pull the fan back out, drill the holes for the L Brackets in the fan shroud. Using the ¼ bolts, lock nuts and fender washers, mount the brackets to the fan. Now install the fan onto the radiator.
Image
Image


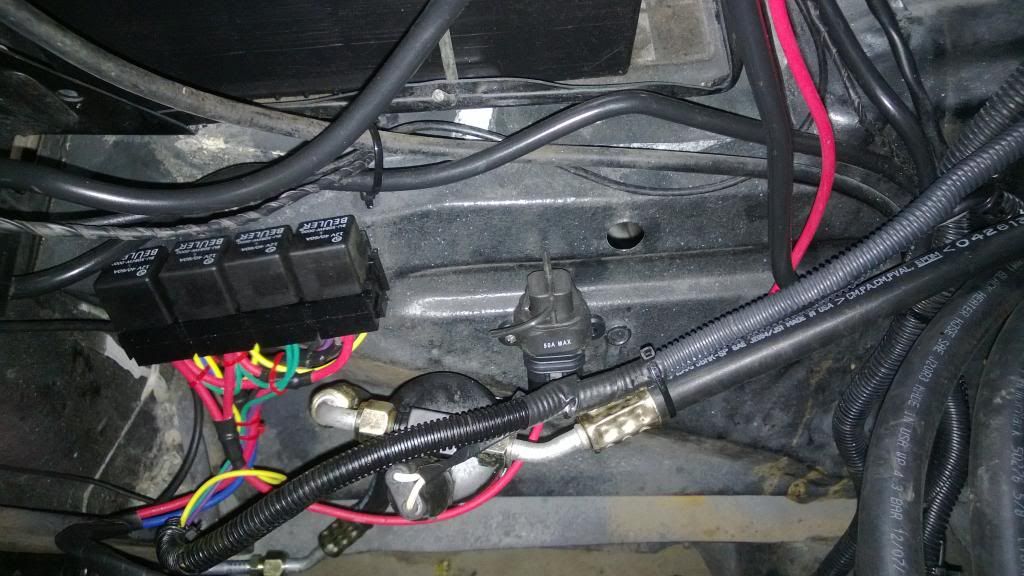
8. Time to wire the fan, I mounted the relays and main fuse just below the battery and the fuse for the ignition wire was mounted on the finder close to the starter solenoid. Relays need to be mounted within 18 inches of the battery and don’t mount them on the fan shroud. (If you order the relay kit it will have mounting and wiring instructions with the kit.)
Image

9. Follow the wiring instructions that are included with the relay kit and wire everything up.

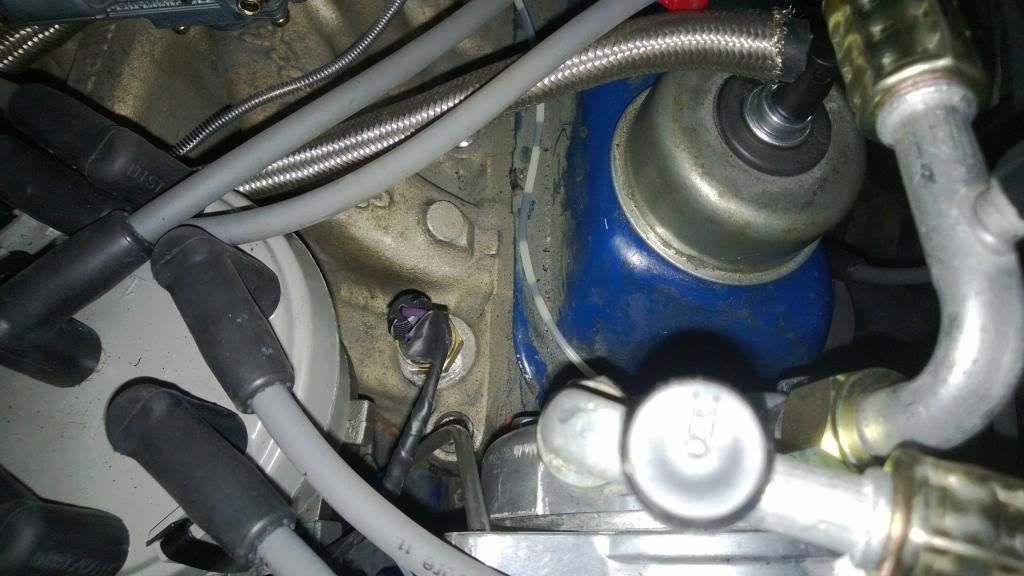
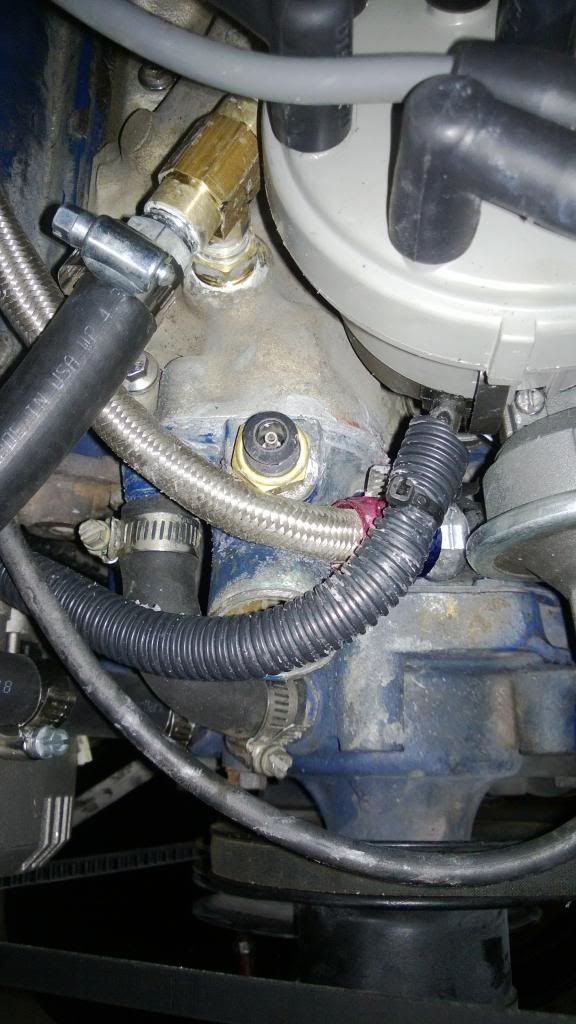
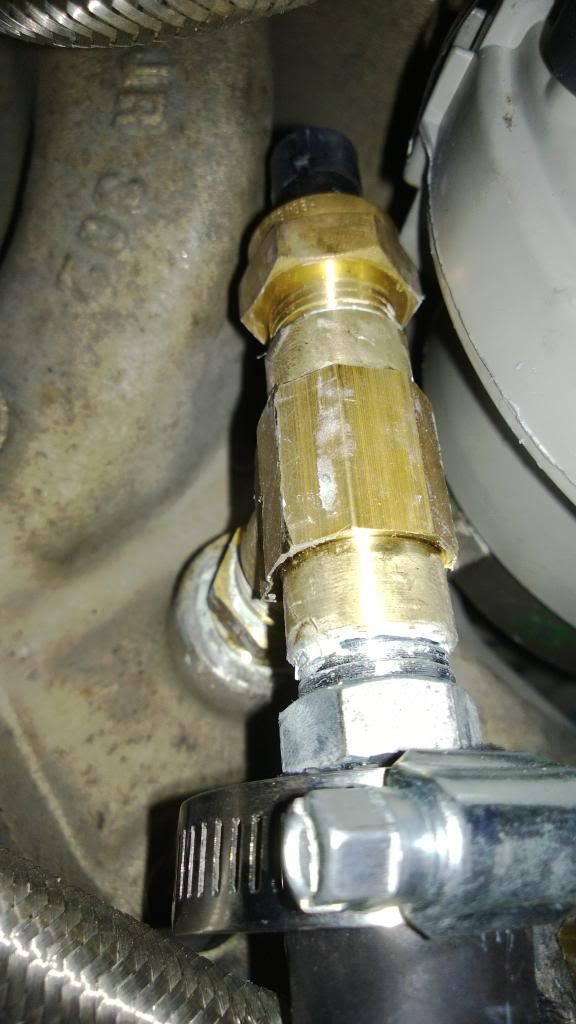
10. Now install the sensors, I placed one sensor in the thermostat housing and the other in the manifold (I have an aftermarket intake). This left me with an issues as to where to put my temperature sending unit. I just went to Lowes and got a brass T and used one of the outlets on the intake that is also used for the heater hose and put the T in along with the header house outlet and the temperature sending unit. This seems to be working fine but I think I will change this out in the future using a radiator hose adapter from Hollister road. If you don’t have enough spots for the sending units take a look at the hose adapters here: http://www.hollisterroad.com/products.a ... e+Adaptors

Temp Sending Unit:
Image

180 Temp Fan Sensor
Image

200 Temp Fan Sensor
Image

Put your remaining parts back on and start it up and make sure the fan comes on at the correct temps and check for leaks. I tested mine in my garage here in FL and it worked great. Only took the fan a few minutes to cool it down enough to shut the fan back off again while in the garage. The fan hasn't needed to hit the high speed yet because even the low speed moves a lot of air. So far the temp gauge hasn't gone above 190. I will post up more info the longer I run this setup. I will also update the thread if needed to add any additional information I might have forgotten. Please feel free to ask questions or add any input.

Would also like to thank Dave Chapman from hollister road. Gave me a lot of info on the fan setup.

I have gotten a lot of information from this site and I am very thankful so I figured I will try to give a little back.

Thanks!!
Last edited by 67Doors on Thu Sep 12, 2013 3:49 pm, edited 1 time in total.
User avatar
sargentrs
100% FORDified!
100% FORDified!
Posts: 9866
Joined: Fri Jun 22, 2007 9:30 am
Location: Georgia, Jasper

Re: Mark 8/Thunder Bird two speed electric fan install

Post by sargentrs »

Thanks a ton for posting your write up! I'm going the same route and it will make the job much easier. :thup:
Last edited by sargentrs on Fri Sep 13, 2013 5:13 pm, edited 1 time in total.
Randy
1970 F100 Sport Custom Limited LWB, 302cid, 3 on the tree. NO A/C, NO P/S, NO P/B. Currently in 1000 pcs while rebuilding. Project thread: http://www.fordification.com/forum/view ... 22&t=59995 Plan: 351w, C4, LSD, pwr front disc, p/s, a/c, bucket seats, new interior and paint.
1987 F-150 XLT Lariat, 5.0/C6 auto.
User avatar
HIO Silver
100% FORDified!
100% FORDified!
Posts: 1970
Joined: Sat Jul 23, 2011 11:31 pm
Location: Devil's Mountain, CA

Re: Mark 8/Thunder Bird two speed electric fan install

Post by HIO Silver »

Excellent write up and pictorial. Reps!
70 F100 LB 2WD, 360FE, E-Street EFI, TKO-500, 76K original miles.. follow my rebuild: The Lo-Buck Bumpside
71 F250 LB, 2WD, 360FE, T18, PS, PB, D60 with 4.11s
73 F100 SB 4WD, 390FE, NP435, +4 on 35s

01 Ferrari 360 Spider F1
01 F150 SuperCrew Lariat 4WD
01 PT Cruiser Limited (DD)
68 Mustang
65 Mustang
motzingg
Blue Oval Fan
Blue Oval Fan
Posts: 742
Joined: Wed Apr 24, 2013 1:11 pm
Location: Milwaukee WI

Re: Mark 8/Thunder Bird two speed electric fan install

Post by motzingg »

this is awesome, thanks!

time to go hit the junkyard.... looking for 94-97 T-bird or Cougar fan.
motzingg
Blue Oval Fan
Blue Oval Fan
Posts: 742
Joined: Wed Apr 24, 2013 1:11 pm
Location: Milwaukee WI

Re: Mark 8/Thunder Bird two speed electric fan install

Post by motzingg »

man i just wanted to bump this thread again because its so good and someone was just asking about a fan install...

I think this would be a great one to have in the tech article section, could a moderator add it?
67Doors
New Member
New Member
Posts: 56
Joined: Tue Mar 12, 2013 9:25 am

Re: Mark 8/Thunder Bird two speed electric fan install

Post by 67Doors »

Just a quick update, I changed the thermostat to a 180 and the fan still turns on and off just fine. Temps are staying around 185-190, we will see what they are when the Florida heat kicks in.
olblue67
New Member
New Member
Posts: 6
Joined: Thu Sep 29, 2016 1:04 am

Re: Mark 8/Thunder Bird two speed electric fan install

Post by olblue67 »

Just read this and i want to thank you for the information. I will be doing this to my truck very soon.
olblue67
New Member
New Member
Posts: 6
Joined: Thu Sep 29, 2016 1:04 am

Re: Mark 8/Thunder Bird two speed electric fan install

Post by olblue67 »

Just an update on this. I finally rounded up all of the parts and i removed the stock radiator fan and discovered that there is not enough room between the radiator and the water pump, The fan is around 5 1/2" deep and i only have 3 3/4" of space. I have a FE block and apparently it is much longer than a small block. I am going to have to try and figure out what fan will work with this unless someone else has had the same issue and has a solution.
User avatar
Ranchero50
Moderator
Moderator
Posts: 5799
Joined: Wed Nov 08, 2006 7:02 pm
Location: Maryland, Hagerstown
Contact:

Re: Mark 8/Thunder Bird two speed electric fan install

Post by Ranchero50 »

Maybe offset the fan or turn it into a pusher style?
'70 F-350 CS Cummins 6BT 10klb truck 64k mile Bahama Blue

Contact me for CNC Dome Lamp Bezels and Ash Tray pulls.
User avatar
BobbyFord
100% FORDified!
100% FORDified!
Posts: 5372
Joined: Sun Feb 04, 2007 9:52 am
Location: Chatsworth, California

Re: Mark 8/Thunder Bird two speed electric fan install

Post by BobbyFord »

Just curious why the OP said the relays must mounted be within 18" of the battery.
olblue67
New Member
New Member
Posts: 6
Joined: Thu Sep 29, 2016 1:04 am

Re: Mark 8/Thunder Bird two speed electric fan install

Post by olblue67 »

i will look to see if i can do one of your suggestions, pusher may be the way to go. Bobby, the wire that goes to the battery is only that long. You could make your own and mount it wherever you want. the rest of the loom has plenty of wire on it.
User avatar
BobbyFord
100% FORDified!
100% FORDified!
Posts: 5372
Joined: Sun Feb 04, 2007 9:52 am
Location: Chatsworth, California

Re: Mark 8/Thunder Bird two speed electric fan install

Post by BobbyFord »

olblue67 wrote:i will look to see if i can do one of your suggestions, pusher may be the way to go. Bobby, the wire that goes to the battery is only that long. You could make your own and mount it wherever you want. the rest of the loom has plenty of wire on it.
Nice. My battery is under the bed :D
Mispeld
New Member
New Member
Posts: 19
Joined: Mon Mar 27, 2017 11:20 am

Re: Mark 8/Thunder Bird two speed electric fan install

Post by Mispeld »

Is that an aftermarket AC kit installed or an updated compressor?
olblue67
New Member
New Member
Posts: 6
Joined: Thu Sep 29, 2016 1:04 am

Re: Mark 8/Thunder Bird two speed electric fan install

Post by olblue67 »

After much checking, This Will not work on a Big Block. Not enough room behind the Radiator or as a pusher. I am going to put a Flex-a-Lite on it and hope that works well. :(
Post Reply