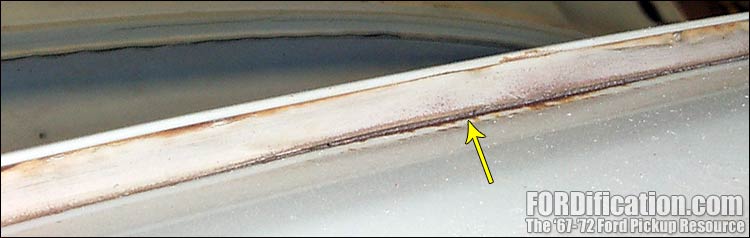
In this picture, the yellow arrow is pointing to an area where the seam sealer has started to shrink, exposing a crack between it and the sheetmetal, allowing moisture in. OK, let's clean that stuff out and see what it looks like underneath:
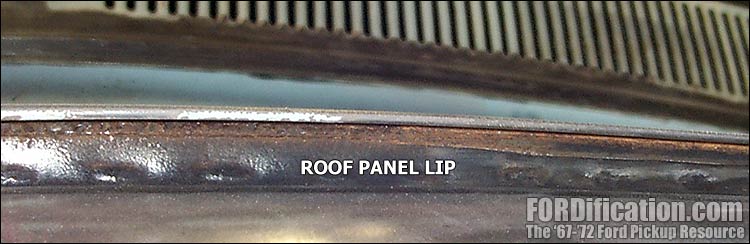
This picture was taken after I scraped out all the caulking in mine and used a wire wheel to clean it up a bit. You can see how the roof panel has a 1/4" lip on it that extends out into the drip rail. The drip rail is pinched between the roof panel and the windshield area and then spot-welded. (You can see the spot-welds there too.) Anyway, when the caulking dries up or cracks and allows moisture to get in under it, it can then easily work it's way between the spot welds and into the cab, where it starts rusting. You need to periodically check your caulking and if it's questionable, take a few minutes to clean it out and apply a new application of seam sealer in there. This would also be very good preventative maintenance, to keep a rust-free cab from getting this dreaded cancer.